 blog
blog
Best Landscape Lighting for Trees: A 2026 Guide
Table of Contents
- How to Choose the Best Landscape Lighting for Trees
- Uplighting vs. Downlighting vs. Moonlighting
- Low Voltage vs. Line Voltage Systems
- Tree Uplighting Techniques for Different Species and Trunks
- Landscape Lighting Lumen Requirements for Trees
- Outdoor Lighting Beam Angles: Narrow, Flood, and Everything Between
- Color Temperature and Kelvin Recommendations for Trees
- Weatherproofing, IP Ratings, and Mounting Options
- Smart Lighting and Sustainable Options for Tree Lighting
- Conclusion
- Frequently Asked Questions
Last Updated: September 18, 2026
How to Choose the Best Landscape Lighting for Trees
Choosing the best landscape lighting for trees starts with matching three things to the tree: the lighting technique, the voltage system, and the fixture's beam and output. At Lightscape Design & Installation, we handle this on site, because a mature oak and a young maple need completely different approaches. Get those three right and a tree anchors the whole yard after dark; get them wrong and you get a flat, washed-out look.
Uplighting vs. Downlighting vs. Moonlighting
Uplighting, downlighting, and moonlighting are the three core techniques for lighting trees, and most great designs use at least two together. Uplighting aims a narrow beam from the ground up the trunk and into the canopy. Downlighting places fixtures above and throws light downward. Moonlighting is downlighting mounted high in a tree, filtered and aimed to cast soft, dappled light below.
Here is how to think about each:
- Uplighting builds drama and highlights bark texture, trunk structure, and canopy shape. It is the workhorse technique for front-yard trees.
- Downlighting handles safety and function, lighting paths, patios, and driveways from above.
- Moonlighting creates atmosphere. It is subtle, glare-free, and best for seating areas under large canopies.
Low Voltage vs. Line Voltage Systems
Low voltage systems run on 12 to 15 volts through a transformer and are the standard choice for residential tree lighting. Line voltage runs at 120 volts and is reserved for large commercial sites or long runs where voltage drop becomes a problem. For most homes, low voltage wins on safety, fixture size, and flexibility.
Tree Uplighting Techniques for Different Species and Trunks
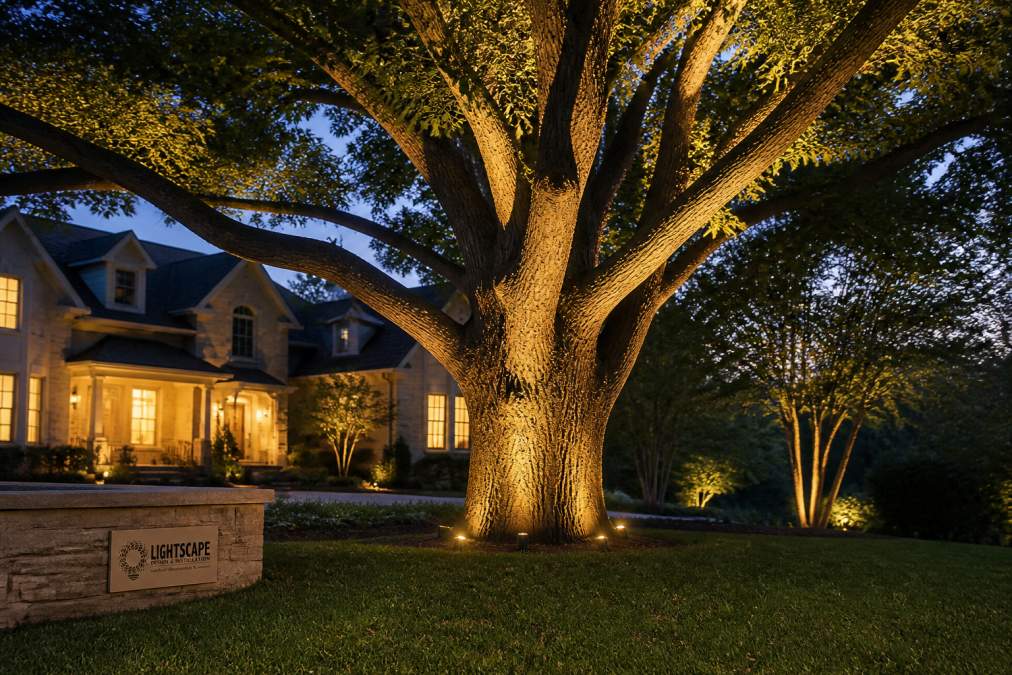
Tree uplighting techniques change with species because bark texture, trunk shape, and canopy density all affect how light behaves. A rough-barked oak catches light and shows dramatic texture, while a smooth-barked crepe myrtle reflects it and can look blown out. Dense canopies swallow light; open canopies let it through.
A quick species guide:
- Oaks and maples: Rough bark rewards grazing light from a narrow beam placed close to the trunk. Use two or three fixtures around the base for a full, dimensional effect.
- Pines and evergreens: Dense needles block light. Place fixtures farther out and aim upward at a steeper angle to reach the lower branches.
- Crepe myrtles and birches: Smooth, light bark reflects easily. Use lower output and a wider beam to avoid a harsh hotspot.
Positioning for Canopy, Trunk, and Shadow Effects
Positioning decides whether a tree looks lit or looks like a lamp. Place fixtures one to three feet from the trunk and aim them up the main structure rather than straight into the canopy, so the trunk lights first and light travels up into the branches. For a fuller effect, use two fixtures on opposite sides and cross their beams slightly.
Landscape Lighting Lumen Requirements for Trees
Landscape lighting lumen requirements for trees depend on tree height and canopy density, not a single universal number. A small ornamental tree might need a few hundred lumens, while a tall canopy tree can need well over a thousand to read clearly at night. Brighter is not better: excess lumens create glare, wash out bark detail, and spill onto neighboring properties.
As a working rule:
- Small ornamental trees (under 15 feet): low output, wide beam
- Medium trees (15 to 30 feet): moderate output, narrow to medium beam
- Large canopy trees (over 30 feet): higher output, narrow beam, multiple fixtures
Turning Lumens Into a Fixture Count
Most homeowners ask for a lumen number when what they need is a fixture count. The two are linked, but the math runs through beam angle and distance, not lumens alone. A practical way to plan:
- Measure the lit height. For a tree you want to read to 20 feet up, you are lighting roughly 20 vertical feet of trunk and lower canopy.
- Estimate coverage per fixture. A narrow 15-degree beam spreads only a few feet wide at 20 feet of throw, so it lights a column, not a tree. A 40-degree beam spreads much wider but loses intensity over the same distance.
- Divide the target height by the coverage. A 25-foot tree lit with narrow beams typically wants two to three fixtures placed around the base; a 40-foot canopy tree often wants three to five, aimed at different limbs so the light reads as layered rather than as one bright stripe.
Why the Spec Sheet Overstates Real Output
A fixture rated at 800 lumens does not deliver 800 lumens to the tree. Voltage drop, beam angle, distance to the target, and any lens or shroud all reduce what lands on the bark, and on a long 12-volt run a fixture near the end of the line can visibly dim compared with one near the transformer. That is why a plan that only adds up lumens on paper can still disappoint.
Matching Output to the Tree, Not the Catalog
Two trees of the same height can need different output. A dense evergreen swallows light and needs more of it aimed at a steeper angle to reach the lower branches. A smooth-barked ornamental reflects light easily and can look blown out at half the output. Rough-barked species reward grazing light that skims the trunk and reveals texture.
Outdoor Lighting Beam Angles: Narrow, Flood, and Everything Between
Outdoor lighting beam angles control how wide or tight the light spreads, and choosing the wrong one is the most common reason tree lighting disappoints. A narrow beam (roughly 10 to 20 degrees) throws a tight, dramatic column up a trunk, while a flood light (40 to 60 degrees or wider) covers a broad area and suits low, spreading canopies or grazing across several trees at once.
Call to schedule a consultation →
Match the beam to the job:
- Narrow beam: tall trunks, dramatic uplighting, distant fixtures
- Medium beam: most general tree uplighting
- Flood light: wide canopies, moonlighting, and washing light across a bed of plantings
Color Temperature and Kelvin Recommendations for Trees
Color temperature, measured in Kelvin, determines whether your trees look warm and natural or cold and clinical. For tree lighting, stay between 2700K and 3000K: this warm white range flatters bark, foliage, and your home's exterior, while anything above 4000K looks blue-white and industrial, closer to a parking lot than a garden.
Weatherproofing, IP Ratings, and Mounting Options
Weatherproofing protects the investment, and the IP rating is how you judge it. An IP rating is a two-digit standard: the first digit covers solids (dust, grit, insects) on a scale of 0 to 6, and the second covers water on a scale of 0 to 8. A higher second digit means better water resistance, so an IP65 fixture is dust-tight and protected against water jets, while an IP68 fixture is rated for continuous immersion.
What to look for:
- Fixture housing: cast aluminum holds up far better than thin stamped metal or plastic
- Finish: powder coated finishes resist chipping and fading
- Seals: quality gaskets keep moisture out of the housing and connectors
- Mounting: ground stakes for uplighting, mounting brackets for trunk and branch mounting, and tree-friendly straps that do not damage bark
How Water Actually Gets In
A fixture rarely fails because the housing cracked; it fails because water entered through a seal, connector, or lens gasket and sat inside. In a freeze-thaw climate, that trapped moisture expands, pushes seals further open, and the failure shows up right after the first hard winter. Corrosion follows, and by the time the light dims or flickers, the damage is internal.
Mounting Without Harming the Tree
For mounting on tree trunks and branches, never drive screws into the tree. A screw wound invites decay, and a fixture screwed tight to a growing trunk can be swallowed by new wood within a few seasons. Use straps or brackets that allow the tree to grow without girdling it.
Matching the Mount to the Technique
Mounting is not just a durability question; it decides what the light can do. Ground stakes suit uplighting because they sit low and throw light up the trunk, while trunk and branch brackets suit downlighting and moonlighting, where the fixture sits above the target and casts light downward through the canopy. A fixture mounted in the wrong place cannot be aimed into the right place, no matter how good its rating.
Smart Lighting and Sustainable Options for Tree Lighting
Smart lighting and sustainable design are where tree lighting is heading, and both are worth planning for now. Smart controls let you schedule scenes, dim fixtures, and change the mood from a phone, brighter for a party, a soft glow for an ordinary evening, which also saves energy, since fixtures run only when and at the level you need.
Conclusion
The gap between a system that looks installed and one that looks designed comes down to technique, output, beam angle, and color temperature working together. Most homeowners disappointed by tree lighting were sold fixtures, not a plan. Lightscape Design & Installation designs and installs custom systems built around each tree and property, using USA-made premium fixtures, integrated LED technology with no bulbs to replace, and a 20-year warranty.
Frequently Asked Questions
What is the best way to light outdoor trees?
The best approach depends on the tree's size and shape. For most trees, use low voltage LED uplights placed 12 to 24 inches from the trunk, aimed upward at a 15 to 30 degree angle. Warm white light (2700K to 3000K) keeps the foliage looking natural. Use narrow beam angles for tall trees and wider beams for broad canopies. Always test placement at night before burying wires.
How many lumens to uplight a large tree?
A large tree typically needs 400 to 800 lumens per fixture, depending on canopy density and height. Dense canopies absorb more light, so you may need two or more fixtures per tree. Start with one fixture per 10 to 15 feet of tree height and adjust after seeing the result at night. Too many lumens washes out bark texture and creates glare.
Should I use warm or cool white light for trees?
Warm white light in the 2700K to 3000K range is the standard choice for trees. It mimics the warm glow of sunset and brings out the natural tones in bark and foliage. Cool white light above 4000K looks harsh and artificial on trees, making them appear gray or washed out. For a soft moonlight effect, use 2700K fixtures placed high in the canopy aiming down.
What is the difference between flood and spot lighting for trees?
Spotlights have a narrow beam angle, usually 10 to 30 degrees, and focus light tightly on a specific area like a trunk or a single branch. Flood lights spread light across a wider area, typically 60 to 120 degrees, and work well for broad canopies or groups of trees. Most tree lighting designs use spotlights for accent and flood lights for wider coverage.