 how-to
Landscape Lighting for Curb Appeal: 7 Steps That Work
Table of Contents
- Why Landscape Lighting for Curb Appeal Delivers the Highest Return
- Step 1: Map Your Property's Focal Points Before You Buy Anything
- Step 2: Choose the Best Low Voltage Landscape Lighting for Your Layout
- Step 3: Apply Proven Landscape Lighting Design Tips for Balanced Light
- Step 4: Front Yard Lighting Ideas That Make a Strong First Impression
- Step 5: Add Smart Controls, Timers, and Photocells for Effortless Operation
- Step 6: Maintain Your System and Troubleshoot Common Problems
- Conclusion: Your Next Step to a Standout Exterior
- Frequently Asked Questions
Last Updated: October 4, 2026
Why Landscape Lighting for Curb Appeal Delivers the Highest Return
Landscape lighting for curb appeal is the practice of using low-voltage fixtures to shape how a property looks, feels, and functions after dark.
Your yard is invisible half the day. From October through March, most homeowners pull into a dark driveway by late afternoon.
Good lighting does three jobs at once:
- It makes walkways safe for guests and deliveries
- It draws attention to the best parts of your home
- It makes your property look cared for
The Illuminating Engineering Society publishes recommended light levels for outdoor spaces, and its guidance backs up what we see on site: the right amount of light beats more light.
Most people over-light. That is the mistake we fix most often.
Step 1: Map Your Property's Focal Points Before You Buy Anything
Walk your property at dusk before you spend a dollar. Mark what you want people to notice and what you would rather hide. This one exercise prevents most bad lighting decisions.
Look for these focal points:
- The front door and its surrounding trim
- Large trees with interesting bark or shape
- Stone, brick, or siding details worth showing off
- Walkways and steps people actually use
- Anything ugly you want to downplay, like utility boxes
Write it down. Take photos at night. When you know your focal points, fixture choices get much easier.
Highlighting Architectural Features That Define Your Home's Character
Architectural lighting is about grazing light across a surface, not blasting it. A wall wash or a narrow beam makes texture appear. Flat, front-facing light erases it.
The trick is angle. Light placed close to a wall shows every brick and board. Light placed far away flattens the whole facade.
Uplighting Trees and Shrubs to Add Vertical Drama
Uplighting sends light from the ground upward into a canopy. It adds height and depth that path lights alone cannot create.
A few things matter here:
- Place the fixture at the drip line, not against the trunk
- Use narrow beam spread for tall trees
- Aim between major branches, not straight up the middle
Big oaks throw heavy shadows. That is normal, and it can look great. The goal is not to erase shadow; it is to shape it.
Step 2: Choose the Best Low Voltage Landscape Lighting for Your Layout
The best low voltage landscape lighting runs on 12 to 15 volts and pairs with a transformer sized to your total load.
Sizing the transformer is where most DIY projects go wrong. Add up the wattage of every fixture, then leave headroom. A transformer running at full capacity will trip and dim.
Voltage drop is the other trap. Long runs lose voltage, so fixtures at the end of a run look dimmer. Thicker cable and shorter runs fix it.
Fixture Types: Path Lights, Spotlights, Flood Lights, and Downlighting
Each fixture type has one job. Match the fixture to the job and the design holds together.
| Fixture Type | Best For | Typical Beam |
|---|---|---|
| Path lights | Walkways, garden beds, driveway edges | Wide, soft pool |
| Spotlights | Trees, statues, wall features | Narrow, focused |
| Flood lights | Wide facade washes, security zones | Broad, even |
| Downlighting | Under eaves, pergolas, hardscape walls | Directed downward |
Path lights guide feet. Spotlights create drama. Flood lights cover ground. Downlighting adds soft ambient light without glare.
Budget-Friendly vs. Premium Hardware: What You Get at Each Tier
Entry-level fixtures are usually stamped metal with a painted finish. They work, but the finish fades and the seals fail within a few seasons.
Premium fixtures use cast aluminum or solid brass with a powder-coated finish. They hold up to weather, and the connections stay tight.
What most buyers miss is the warranty gap. Budget fixtures often carry a year or two. Premium USA-made fixtures can carry coverage measured in decades, which is why we back ours for 20 years.
Step 3: Apply Proven Landscape Lighting Design Tips for Balanced Light
Good landscape lighting design tips all point to the same idea: layer your light. One bright source flattens a yard. Three or four soft sources give it depth.
Use these rules on any property:
Call to schedule a consultation →
- Keep light levels low and consistent
- Aim fixtures away from the viewer's eye
- Mix tall uplighting with low path lighting
- Leave dark space between lit areas
That last point surprises people. Darkness is part of the design. Contrast is what makes light look intentional.
Color Temperature and Kelvin: Getting the Warm Glow Right
Color temperature is the measure of how warm or cool a light appears, rated in Kelvin. Landscape lighting should land between 2700K and 3000K for a warm, natural glow.
Go higher and your home turns blue-white and clinical. Go lower and colors look muddy. The 2700K to 3000K range matches the warm feel of interior lighting, so the outside and inside of your home agree with each other.
Step 4: Front Yard Lighting Ideas That Make a Strong First Impression
Front yard lighting ideas should serve the view from the street first. That is the angle that shapes curb appeal, and it is the angle most homeowners never check.
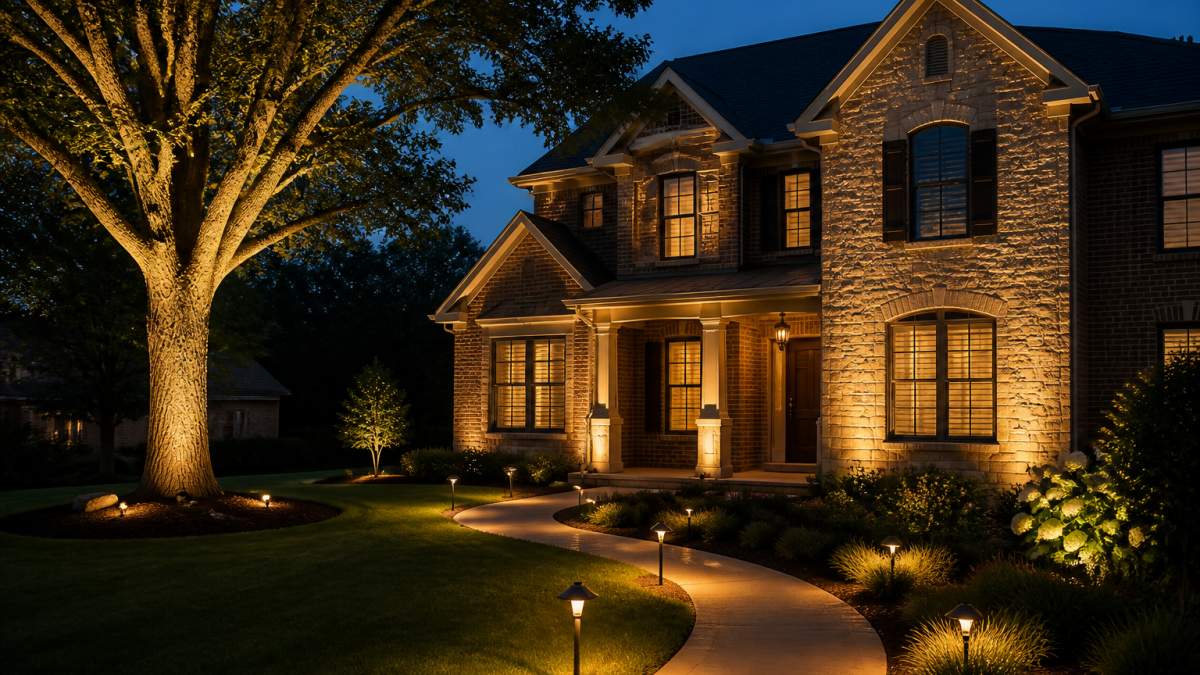
Start with the entry. Light the door, the steps, and the walkway leading to it. Then work outward.
A few combinations that work well:
- Uplight two trees flanking the driveway
- Wash the front facade with soft, even light
- Add path lights along the main walk
- Light house numbers so deliveries find you
Keep the beam spread tight on the facade and wider on the path. The eye should travel from the street to the door without stopping.
Step 5: Add Smart Controls, Timers, and Photocells for Effortless Operation
A lighting system you have to remember to turn on is a lighting system that stays off. The control layer is what makes landscape lighting actually function as curb appeal night after night. Most guides mention "smart controls" and move on. Here is how the layers actually stack.
The Three Control Layers, From Simplest to Smartest
Photocell (dusk-to-dawn sensor). A photocell reads ambient light and closes the circuit when it gets dark. It is the most reliable layer because it needs no schedule and no network.
Astronomical timer. A standard timer runs on clock time, so it drifts out of sync with sunset through the year.
App and Wi-Fi control. A smart transformer or a plug-in control module adds phone control, zoning, dimming, and scene presets.
How the Layers Combine
A well-designed system usually layers all three. The photocell or astronomical timer handles the daily on/off automatically. The app layer handles dimming, zoning, and overrides. That way, if the network goes down, the lights still come on at dusk, you just lose the fine control until it is back.
What to Check Before You Buy a Smart Transformer
- Low-voltage output compatibility. Confirm the transformer outputs 12V or 15V AC and that its total wattage exceeds your connected load with headroom to spare.
- Zone count. Each zone is a separately controlled circuit. Two to four zones cover most residential front yards; more zones mean finer control but more wiring.
- Dimming method. Some smart transformers dim by lowering voltage, which can make LEDs flicker or shift color. Others use low-voltage PWM dimming, which holds color and output steady. Ask which method the unit uses.
- Protocol. Wi-Fi is simplest but range-limited outdoors. Some systems use a proprietary mesh or a low-power protocol with a bridge. Check that the signal reaches your transformer location.
- Local control fallback. A physical switch or dial on the transformer means the system still works if the app or network fails.
The Practical Payoff
Beyond convenience, controls are where the energy savings actually live. A system on an astronomical timer that runs from dusk to 11 p.m. uses a fraction of the electricity of one left on all night, and it looks intentional rather than forgotten. If you host often, scene presets are the feature people end up using most: one tap for a dinner-party look, another for everyday.
A Note on Longevity
Smart hardware ages faster than the fixtures it controls. The brass fixture you install today may outlive three generations of control modules. That is an argument for keeping the control layer modular, a plug-in module or a replaceable transformer, rather than buying a fixture with the electronics sealed inside. When the app is discontinued, you swap the module, not the whole system.
Step 6: Maintain Your System and Troubleshoot Common Problems
Maintenance is simple, and it takes about an hour twice a year. Check connections, clear debris from fixtures, and trim plants that have grown over a lens.
Common problems and their usual causes:
- Half a run looks dim: voltage drop, or a loose connection
- One fixture is out: a failed LED module or a corroded socket
- Lights flicker at dusk: a photocell getting stray light
- Transformer trips: total load too close to capacity
Integrated LED fixtures remove the most common failure point entirely, because there are no bulbs to replace and no sockets to corrode.
Conclusion: Your Next Step to a Standout Exterior
A dark exterior wastes the best hours of your property. Lighting fixes that, and it keeps working long after the install crew leaves.
If you would rather not guess at beam spread, transformer sizing, and Kelvin, that is the work we do every day. Lightscape Design & Installation offers a complimentary on-site consultation, premium USA-made fixtures, integrated LED technology with no bulbs to replace, and a 20-year warranty.
Call to schedule a consultation and see your property the way it should look after dark.
Frequently Asked Questions
Does landscape lighting increase home value?
Yes. A well-designed landscape lighting system enhances curb appeal, which is one of the strongest drivers of perceived property value. Buyers form an impression within seconds of arriving, and a home that looks inviting after dark stands out. Professional-grade fixtures with integrated LED technology also signal quality maintenance, which supports resale appeal. The exact impact varies by market and home style, but the visual improvement alone justifies the investment for most homeowners.
Where should landscape lights be placed for curb appeal?
Focus on three zones: the entry (path lights and a spotlight on the front door), architectural features (uplights or downlights on columns, stone, or siding), and trees or shrubs (uplighting for vertical drama). Driveway edges benefit from low path lights or in-ground fixtures. Avoid placing lights directly facing the street, which creates glare. The goal is layered illumination that guides the eye naturally from the curb to the front door.
What is the best color temperature for landscape lighting?
Most residential landscapes look best between 2700K and 3000K. This range produces a warm, natural glow that flatters stone, brick, wood, and foliage without the harsh blue-white cast of cooler temperatures. For highlighting greenery, 3000K adds crispness. For warm-toned facades, 2700K blends more seamlessly. Avoid anything above 4000K for home exteriors, as it reads as commercial or institutional rather than welcoming.
Is low voltage lighting better for residential curb appeal?
Low-voltage systems (typically 12V) are the standard for residential landscape lighting because they are safe, energy-efficient, and easy to expand. They work with a transformer that steps down household current, and modern LED fixtures draw very little power. The lower voltage also means simpler wiring that can be buried just below the surface. For most front yard lighting ideas, low voltage delivers the right balance of performance, safety, and cost.