 how-to
Residential Architectural Lighting Design Tips
Table of Contents
- Start With a Lighting Plan, Not a Fixture List
- Outdoor Architectural Lighting Ideas That Highlight What You Already Have
- Landscape Lighting Placement: Spacing, Mounting Heights, and Aiming
- Outdoor Lighting Color Temperature: Choosing Warmth That Flatters Your Home
- Why Low-Voltage Landscape Lighting Is the Standard for Residential Design
- Glare Control and Visual Comfort: The Difference Between Elegant and Amateur
- Common Mistakes in Residential Lighting Design
- Frequently Asked Questions
Last Updated: October 5, 2026
Start With a Lighting Plan, Not a Fixture List
Most homeowners seeking residential architectural lighting design tips shop for fixtures first, then placement. That order wastes money.
At Lightscape Design & Installation, every project starts with a plan, not a product list. A lighting plan maps what you want to see after dark, then works backward to fixtures.
Here is the sequence that works:
- Walk your property after dark and note what disappears into shadow
- List the features you want to highlight: trees, columns, stone, walkways
- Decide the mood you want for each zone
- Choose fixture types only after steps one through three
- Set a lighting budget that covers fixtures, wire, transformer, and labor
The transformer and wiring often surprise homeowners who budgeted only for fixtures.
Walk the Property After Dark Before You Buy Anything
Daylight hides everything that matters. A brick facade that looks rich at noon turns flat and gray at night without the right light.
Walk your property after sunset with a notepad. Mark unsafe paths, note trees with good branch structure, and find architectural details like moldings and columns that vanish in the dark. This 20-minute walk saves weeks of second-guessing.
Outdoor Architectural Lighting Ideas That Highlight What You Already Have
The best outdoor architectural lighting ideas do not add decoration. They reveal what is already there.
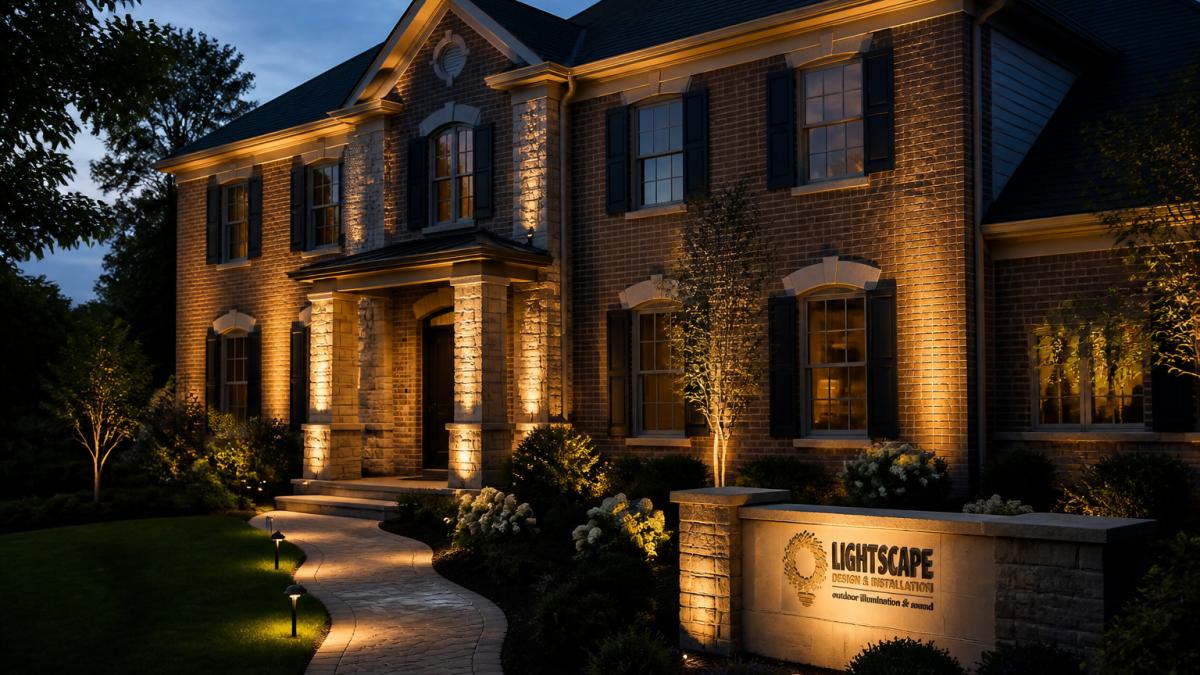
A well-designed scheme treats your house like a canvas: light grazes texture, washes walls, and pulls features forward while letting others recede. The result feels intentional, never busy.
Here are the core techniques:
- Uplighting: light aimed upward to graze walls, columns, and tree trunks
- Downlighting: light from above, often from trees or eaves, to mimic moonlight
- Wall washing: even light spread across a flat surface to show texture
Each technique creates a different effect. Most great residential lighting schemes use two or three together.
Uplighting, Downlighting, and Wall Washing Explained
Uplighting is aimed upward from a ground-level fixture, grazing a wall or tree trunk to pull out texture.
Downlighting comes from above, usually a tree canopy or eave, mimicking soft moonlight.
Wall washing spreads light evenly across a flat surface, flattening texture so a wall reads as a clean backdrop.
A common mistake is using uplighting everywhere, which creates hot spots and harsh shadows. Mix techniques instead.
Landscape Lighting Placement: Spacing, Mounting Heights, and Aiming
Good landscape lighting placement follows one rule: light the object, not the space around it. Aim matters more than fixture count, but aim and spacing only work when you know your target light level, where most residential projects go wrong.
Start With a Target Light Level, Not a Fixture Count
Light levels are measured in foot-candles (fc) in the United States. One foot-candle is one lumen per square foot. Manufacturers publish lumen output, and beam angle tells you how those lumens spread. Divide lumens by the area the beam covers to estimate foot-candles.
Use these as working targets for residential exteriors:
- Walkways and paths: 1 to 2 fc on the walking surface for safety
- Steps and level changes: 2 to 3 fc so treads read clearly
- Driveways and parking areas: 1 to 2 fc, higher at entries
These are starting points, not code. A common pattern is overlighting paths and underlighting architecture. Fewer, better-aimed fixtures outperform a dense grid of low-output lights.
Spacing Rules That Actually Hold Up
- Space path lights 6 to 8 feet apart for even coverage at 1 to 2 fc
- Space wall-grazing uplights 4 to 6 feet apart on long walls to avoid scalloped edges
- Mount uplights 6 to 12 inches from the base of the object
For a long wall, measure the run, divide by target spacing, and round up. A 24-foot wall at 4-foot spacing needs six fixtures; at 6-foot spacing, four. Wider spacing saves money but shows more scalloping, so match spacing to surface texture.
Mounting Heights by Fixture Type
- Path lights: 18 to 24 inches above grade, below eye level
- Well lights (in-grade uplights): flush with grade, aimed up
- Hardscape lights: recessed into retaining walls, 12 to 18 inches above the surface below
Aiming: The Step Most Homeowners Skip
Aim is where amateur installs fall apart. A fixture aimed straight up a wall creates a harsh hotspot at the base and a dark top; angle the beam so light travels along the surface.
Walk the property at night after rough-in and before final adjustment. Stand at the entry, driveway, and main seating area. If you can see the light source from any of those spots, re-aim or add shielding.
How Far Apart Should Landscape Lights Be Placed?
Path lights should sit 6 to 8 feet apart for smooth, even coverage at 1 to 2 fc.
For uplights, spacing depends on what you are lighting. A single column takes one fixture; a long wall may need fixtures every 4 to 6 feet to avoid scalloped edges.
Walk the path at night after installation. If you see pools of light and shadow, adjust spacing. Even coverage beats bright spots.
Call to schedule a consultation →
Outdoor Lighting Color Temperature: Choosing Warmth That Flatters Your Home
Outdoor lighting color temperature decides whether your home looks warm and inviting or cold and clinical. For most homes, 2700K to 3000K is the sweet spot. It is measured in Kelvin (K): lower numbers feel warmer and more amber, higher numbers cooler and more blue.
| Kelvin | Appearance | Best For |
|---|---|---|
| 2200K | Deep amber | Candle-like accents, cozy patios |
| 2700K | Warm white | Most home facades and landscapes |
| 3000K | Soft white | Modern homes, commercial entries |
| 4000K+ | Cool white | Avoid on residential facades |
The most common mistake is mixing temperatures on the same property. A 2700K uplight next to a 4000K path light looks wrong, even if nobody can name why.
Why Low-Voltage Landscape Lighting Is the Standard for Residential Design
Low-voltage landscape lighting runs on 12 to 15 volts instead of standard line voltage, making it safer, easier to install, and cheaper to run. It also pairs cleanly with the dimmers, sensors, and scene controls that turn fixtures into a designed system.
Here is why it has become the default for residential work:
- Safety: the low voltage poses little shock risk, even in wet conditions
- Flexibility: thin cable can be run through beds and along paths without conduit
- Efficiency: integrated LED fixtures draw very little power
The trade-off is voltage drop. Long cable runs lose power, so fixtures at the end of a run can dim. A qualified installer sizes the transformer and splits runs to prevent this.
Sizing the Transformer Without Guessing
Add up the wattage of every fixture on the run, then add 20 to 25 percent headroom for future additions and because LED drivers draw slightly more than rated output at startup.
Voltage drop is the other half of sizing. On a 12-volt system, keep runs under roughly 100 feet at 12-gauge cable for a full load, or split into two shorter legs.
Controls, Dimmers, and Scene Programming in Practice
Low-voltage systems accept controls that line-voltage fixtures often cannot. The practical setup for most homes:
- A low-voltage dimmer on the transformer primary, so the whole run dims together
- A smart transformer with app or voice control for schedules and scenes
- Motion sensors on path and driveway runs for safety without leaving lights on all night
A useful scene pattern for a typical home:
- Evening arrival: facade uplights at 80 percent, path lights at 60 percent, patio off
- Entertaining: facade at 60 percent, path at 40 percent, patio and tree downlights at 70 percent
- Late night: path lights only, at 30 percent, with motion boost on the driveway
Compatibility matters. Not every smart transformer works with every fixture brand, and some dimmers cause flicker with certain LED drivers. Confirm the transformer, dimmer, and fixture are rated to work together before buying.
Energy Use and Lifecycle Costs
LED fixtures draw a fraction of the power of the halogen and incandescent fixtures they replaced, and last far longer.
The bigger lifecycle cost is labor. Halogen and incandescent bulbs need replacing every year or two, each replacement a trip up a ladder or a service call.
For wet locations, the National Electrical Code sets requirements for fixtures and connections near pools, fountains, and irrigation. The National Electrical Code guidance from NFPA is the place to check what applies to your setup.
Glare Control and Visual Comfort: The Difference Between Elegant and Amateur
Glare is the biggest sign of an amateur lighting job, and the easiest to fix. It happens when a light source sits in your line of sight: you see the bulb, not the object it lights.
Ways to control glare:
- Use fixtures with shields, louvers, or hoods
- Aim fixtures away from walkways, windows, and seating
- Keep light sources below eye level where possible
Visual comfort is not about dim light. It is about light that lands where it should and stays out of your eyes. The Illuminating Engineering Society publishes recommended practices for outdoor lighting that guide this work.
Common Mistakes in Residential Lighting Design
Most residential lighting design problems come from a short list of mistakes. Avoid these and your project will look better than most.
- Buying fixtures before making a plan
- Using one color temperature on part of the yard and another elsewhere
- Ignoring the Department of Energy guidance on outdoor lighting for efficiency and light pollution
Light that spills off your property wastes energy and annoys neighbors. Good design keeps light where it belongs.
If large trees cast heavy shade, lighting still works. We aim fixtures to catch bark texture and lower branches, then add path lights for safety.
Frequently Asked Questions
What are the basic principles of architectural lighting design?
Residential architectural lighting design rests on three principles: layer your light sources rather than relying on one, aim fixtures to graze or wash architectural features instead of blasting them, and control glare so the source stays hidden. A good lighting scheme combines ambient, task, and accent lighting, uses warm color temperatures around 2700K to 3000K, and adjusts brightness with dimmers or smart controls. The goal is depth, warmth, and visual comfort, not maximum brightness.
How far apart should landscape lights be placed?
Spacing depends on fixture type and the effect you want. For path lighting, 6 to 8 feet apart is typical. For uplighting trees or columns, space fixtures to match the width of the feature so beams overlap slightly without creating hot spots. Wall-washing fixtures usually sit 18 to 24 inches from the surface. The right landscape lighting placement comes from testing at night and adjusting, not from a single universal number.
What color temperature is best for residential outdoor lighting?
For homes, 2700K to 3000K is the sweet spot. This range produces warm, natural-looking light that flatters brick, stone, and wood without the harsh blue cast of cooler temperatures. Outdoor lighting color temperature above 4000K reads as commercial or institutional and can make a residence look clinical. Keep the same color temperature across all fixtures on the property so the lighting scheme feels unified.
What are common mistakes in residential lighting design?
The most frequent mistakes include over-lighting a facade until it looks flat, using mismatched color temperatures across fixtures, aiming lights so the source is visible from the street, and skipping a layered plan in favor of floodlights. Another common error is placing fixtures too far apart, which leaves dark gaps. Professional design solves these with careful landscape lighting placement, glare shields, and low-voltage fixtures that can be aimed precisely.
A great lighting plan turns your property into something worth looking at after dark. It takes planning, the right fixtures, and careful aiming. That is the work we do at Lightscape Design & Installation. We offer a complimentary on-site consultation, USA-made premium fixtures, integrated LED technology with no bulbs to replace, and a 20-year warranty. Call us to schedule a consultation and see your home in a new light.