 ultimate-guide
Lighting for Outdoor Living Spaces: The Complete Guide
Table of Contents
- Why Lighting for Outdoor Living Spaces Changes How You Use Your Yard
- Layered Lighting: The Design Framework Behind Every Great Outdoor Space
- Outdoor Patio Lighting Ideas That Make Evenings Outside Feel Effortless
- Outdoor Pathway Lighting: Safety, Guidance, and Curb Appeal
- Tree Uplighting: Dramatic Height and Depth After Dark
- Hardscape Lighting for Walls, Steps, and Built-In Features
- Light Quality, Safety, and Neighbor-Friendly Design
- Conclusion
- Frequently Asked Questions
Last Updated: October 20, 2026
Why Lighting for Outdoor Living Spaces Changes How You Use Your Yard
Lighting for outdoor living spaces is the deliberate layering of low-voltage fixtures to extend a yard's usable hours past sunset while improving safety, depth, and curb appeal.
Most disappointing outdoor lighting isn't too dim, it's too flat. A single floodlight washing over a deck erases the shadows that give a space shape. The fix is a plan, not a brighter bulb.
Layered Lighting: The Design Framework Behind Every Great Outdoor Space
Layered lighting combines three distinct roles of light in one space: ambient, task, and accent. Each answers a different question, and skipping any one is why so many yards feel either gloomy or harsh.
Ambient, Task, and Accent Layers
- Ambient provides the base wash so people can move and see faces. It comes from overhead fixtures, wall sconces, or soft uplighting on the house.
- Task puts light where hands and feet go: steps, grills, prep counters, walkway edges.
- Accent creates drama and depth: tree uplighting, hardscape grazing, a lit water feature.
The layers should also shift by zone. A dining patio wants warm ambient light at face height. A walkway wants low, directed task light. A tree line wants upward accent. Plan by activity first, fixture second.
Outdoor Patio Lighting Ideas That Make Evenings Outside Feel Effortless
The best outdoor patio lighting ideas share one trait: you notice the effect, not the equipment. Start with what happens on the patio after dark, then choose fixtures that serve it.
- Overhead string or café lights for a relaxed ambient wash over a dining table. Look for commercial-grade strands with weather-sealed sockets; consumer strands fail at the connection point within a season or two.
- Low-voltage wall sconces on the house or pergola posts for soft, glare-free face lighting. Mount them at roughly eye level or slightly above so light lands on faces, not the tops of heads.
- Step and riser lights so guests never hunt for the edge of a deck. A dedicated riser fixture beats a path light aimed upward every time.
- Hardscape grazing along a retaining wall or outdoor kitchen for depth. A wide beam angle (roughly 35 to 60 degrees) washes a surface; a narrow beam creates a hotspot.
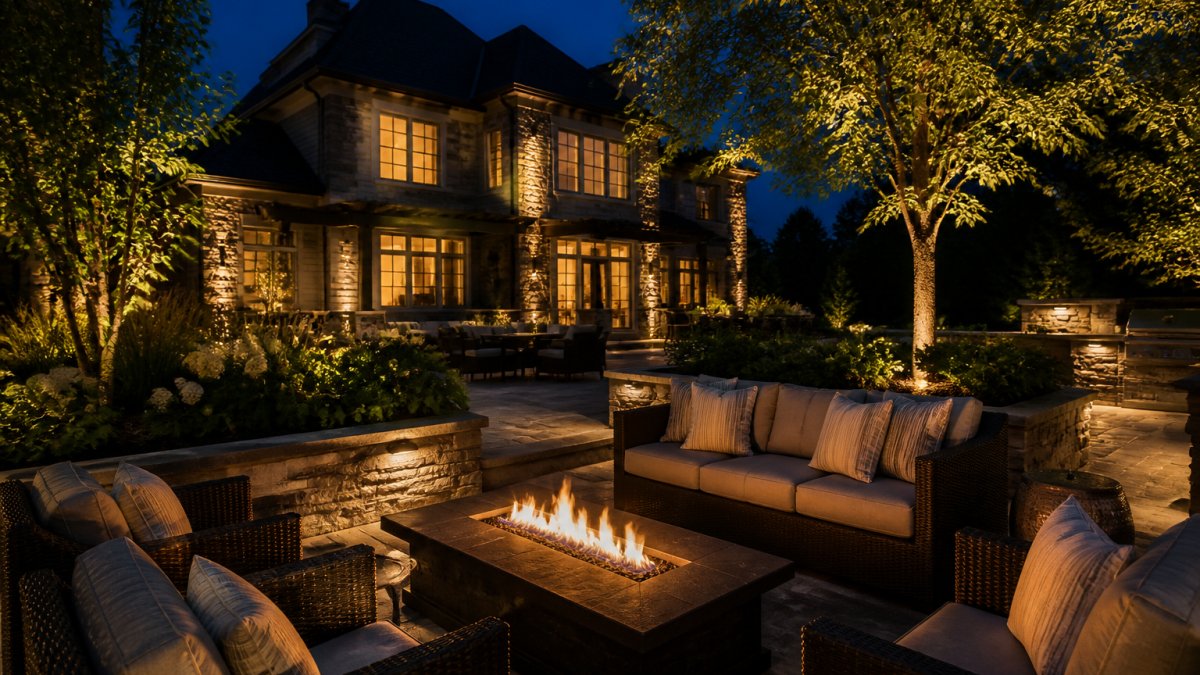
- A dimmable zone for the fire pit, kept low so flames stay the focal point. Fire is its own light source; the fixtures around it should support, not compete.
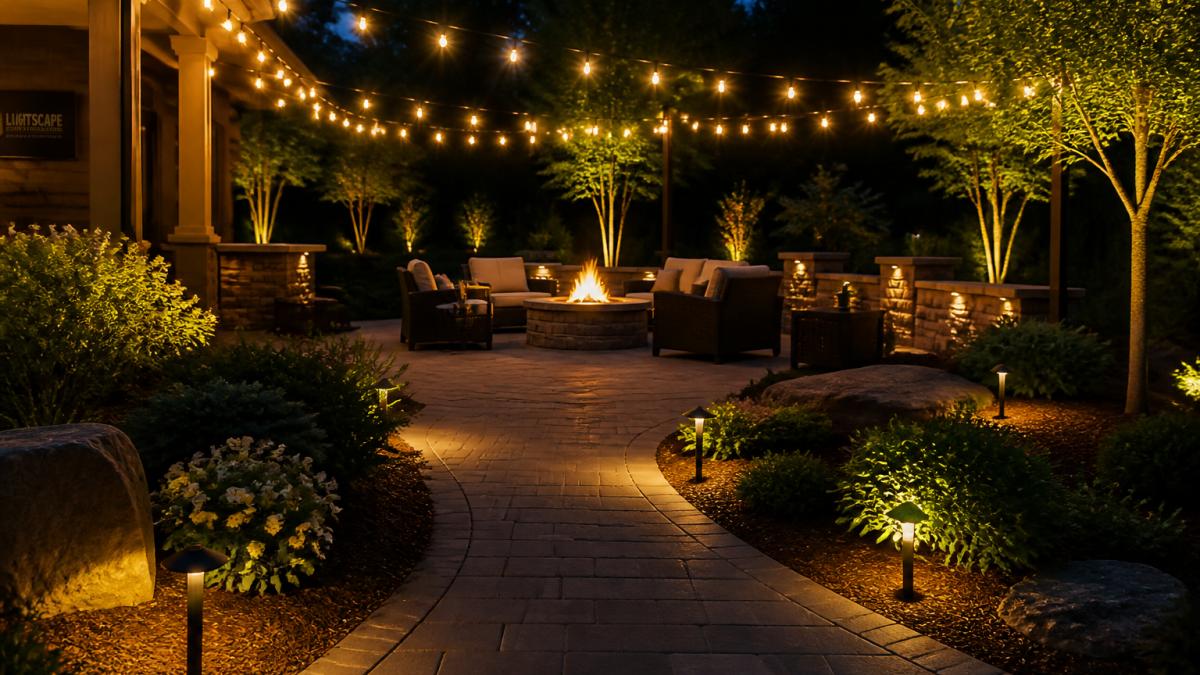
The Specifications That Decide Whether a Patio Feels Right
Most patio lighting disappoints not because fixtures are cheap but because specifications were never chosen deliberately. A few numbers carry most of the weight:
- Color temperature. Warm white in the 2700K to 3000K range reads as inviting and flatters skin tones and wood. Anything cooler starts to feel like a parking lot. Consistency across every fixture on the patio matters more than the exact number, a mix of 2700K and 4000K fixtures looks broken even when each one is fine on its own.
- Lumens, not watts. For ambient patio light, aim for a soft wash rather than high output; the goal is to see faces and food, not to flood the deck. Task areas like a grill or prep counter need more focused output.
- Beam angle. Narrow beams (around 10 to 20 degrees) for accent and grazing, medium beams (25 to 40 degrees) for task, and wide beams (60 degrees and up) for ambient wash. Matching the beam to the job is what keeps light off the neighbor's fence.
Installation Details That Protect the Investment
Patio lighting lives outdoors year-round, so installation matters as much as the fixture. Low-voltage systems are standard for residential patios because they're safe to work around, easy to expand, and suited to this region's freeze-thaw cycles.
- Weather ratings. Fixtures and connections should be rated for wet or damp locations depending on exposure. Under a covered pergola is different from an open deck edge that takes rain and snow.
- Transformers and voltage drop. Long cable runs lose voltage, and fixtures at the end of a run dim or fail if the transformer and wire gauge weren't sized for the load. Planning the run before trenching avoids the problem entirely.
- Burial depth and connections. Weather-rated connections and correct burial depth matter more than the fixture brand; water finds the weak point and half the patio goes dark mid-season.
Our patio work pairs with the hardscape and pergola trades so conduit and fixture locations are set during construction rather than retrofitted later. That coordination is where customized wattages and beam spreads earn their keep, one fixture family specified differently for ambient wash, task light, and accent, all sharing one consistent light color.
Outdoor Pathway Lighting: Safety, Guidance, and Curb Appeal
Outdoor pathway lighting is the task layer that keeps feet on the pavement and steps visible without turning the yard into an airport runway. It's the least glamorous part of the plan and the one guests notice most when it's missing.
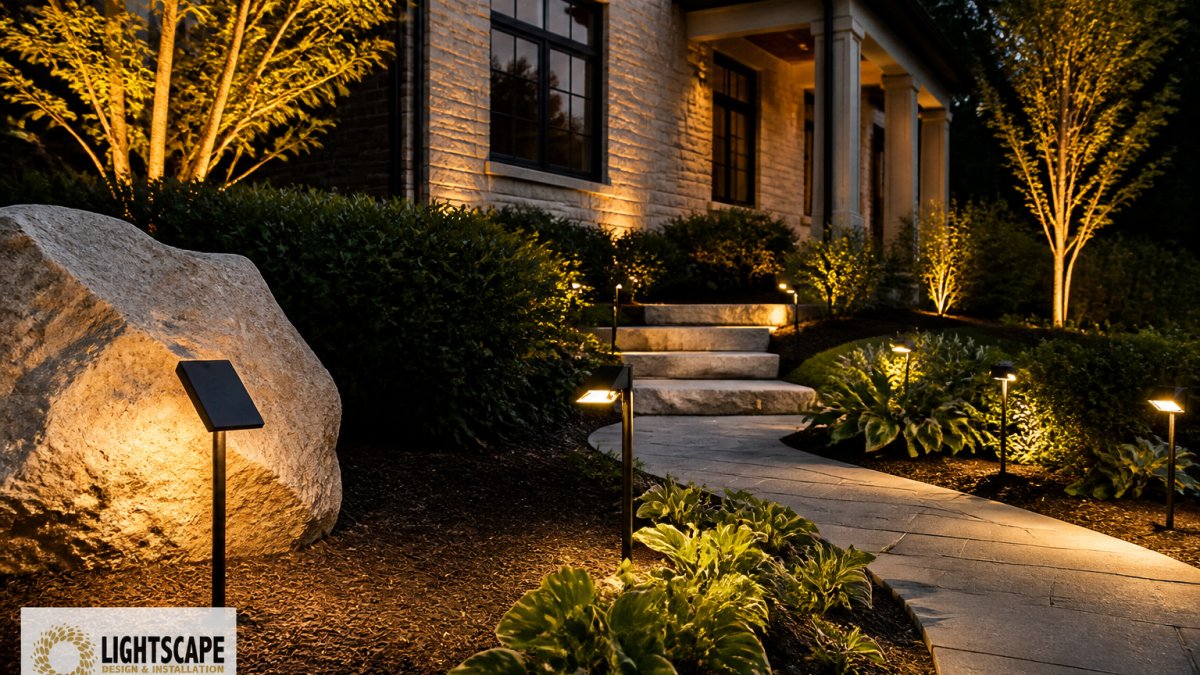
Path lights work best when they're low, shielded, and spaced so pools of light overlap slightly rather than forming bright dots. Aim light down and across the path, not out into the lawn.
Bollards suit driveways and wider walkways where a low, spread glow reads better than a stake light. On steps, a dedicated riser fixture beats a path light aimed upward every time.
Tree Uplighting: Dramatic Height and Depth After Dark
Tree uplighting is the accent move that gives a flat yard vertical scale. A well-lit oak or maple becomes architecture after dark, throwing branches and texture against the sky and pulling the eye up and back.
The craft is in placement and beam control. A narrow beam up the trunk highlights bark and structure; a wider wash catches the canopy and creates a soft glow.
The big-oak question has a simple answer: shadow is the point. A shadowed canopy with a few well-placed uplights reads as depth, not darkness. Choose which trunks and limbs to light rather than trying to illuminate the whole tree.
Hardscape Lighting for Walls, Steps, and Built-In Features
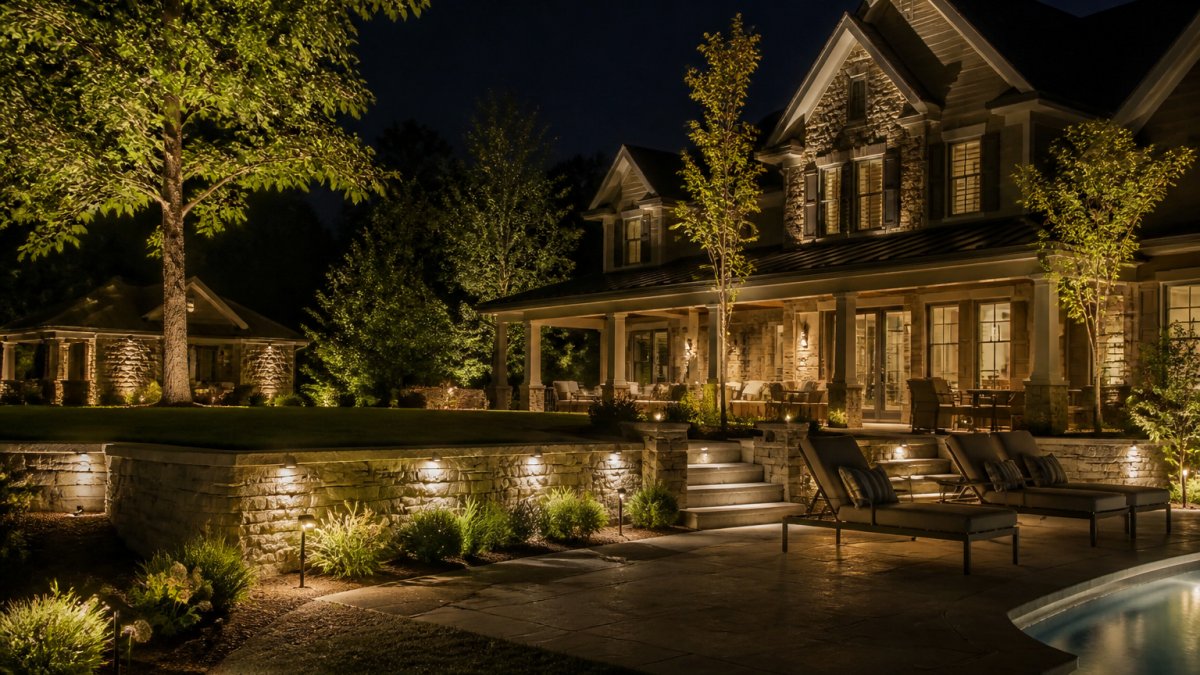
Hardscape lighting is the integrated illumination of built structures: retaining walls, seat walls, steps, pillars, and outdoor kitchens. Because fixtures hide inside the masonry, light appears to come from the stone itself, the layer guests can't quite explain, they just know the wall looks better at night than it has any right to.
This is where a lighting plan has to be coordinated with the hardscape build, not bolted on afterward. Conduit and fixture locations set during construction cost far less than retrofits cut into finished walls.
Request a Lighting Consultation Today →
Fixture Types and Where They Belong
Hardscape lighting isn't one product; it's a family of fixtures chosen for the surface they serve:
- Wall grazing and wash fixtures mount at the base of a retaining or seat wall and throw light up the face. Grazing emphasizes texture; washing gives a softer, more even glow. The choice depends on whether the wall is stone, brick, or smooth stucco.
- Step and riser lights recess into the riser or nosing of a step. They're the safest option for stairs because they light the tread without glare at eye level.
- Pillar and column lights cap or recess into masonry pillars, often at driveway entrances or pergola posts.
Ratings, Wiring, and the Details That Decide Longevity
Hardscape fixtures live in some of the harshest conditions on a property: buried in soil, embedded in masonry, and exposed to freeze-thaw, moisture, and snow load. A few rules keep them working:
- Wet-location ratings. Fixtures embedded in masonry or set at grade should be rated for wet locations, not just damp. The rating is the difference between a fixture that survives a decade and one that fills with water the first spring.
- Conduit and sleeving. Running cable through conduit inside the wall protects it from abrasion and moisture and makes future service far easier. Direct-burial cable is fine in soil; inside masonry, sleeve it.
- Service access. Even sealed integrated LED fixtures occasionally need attention. Planning a serviceable path, a removable cap, a recessed niche, a junction point, saves cutting into finished stone later.
Why Integrated LED Suits Hardscape
Hardscape is where integrated LED fixtures earn their keep. A sealed fixture with no replaceable bulb means no one has to open a wall niche to change a lamp, and consistent light color keeps a long wall or stepped patio looking like one design rather than a patchwork.
Our hardscape lighting work pairs with the masonry and patio trades so the finished wall reads clean by day and glows by night.
Light Quality, Safety, and Neighbor-Friendly Design
Light quality is the difference between a yard that looks designed and one that looks alarmed. Color temperature, beam angle, and glare control decide whether a space feels warm and intentional or harsh and clinical.
A few principles carry most of the weight:
- Consistent color temperature across fixtures so every light in the yard matches.
- Narrow beam angles for accent, wider for ambient, so light lands where it's aimed.
- Glare and light-spill control so brightness stays on your property, not in a neighbor's window or up into the sky.
As documented in the International Dark-Sky Association's guidance on outdoor lighting, shielding fixtures and directing light downward reduces skyglow and light trespass. That's neighbor-friendly design and good design at the same time.
Conclusion
The hardest part of lighting for outdoor living spaces isn't choosing fixtures. It's committing to a layered plan, coordinating it with the hardscape and plantings, and sweating the details that keep glare and spill in check.
That's the work we do at Lightscape Design & Installation. If you'd like to see what your property could look like after sunset, schedule a complimentary consultation or nighttime demonstration and we'll walk the yard with you.
Frequently Asked Questions
How do you light an outdoor living space?
Start with a layered plan: ambient light for overall visibility, task light for steps and cooking areas, and accent light for trees and architecture. Use low-voltage fixtures with warm color temperature (around 2700K) to avoid a harsh, artificial look. Place path lights every few feet along walkways, uplight key trees, and add string lights over seating areas. A professional design ensures each layer works together without glare or dark spots.
What type of lighting is best for an outdoor patio?
For patios, combine overhead string lights or pergola-mounted fixtures for ambient glow with low-voltage hardscape lights on retaining walls and step lights for safety. Integrated LED fixtures in warm white are ideal because they last for years without bulb changes. Avoid bright floodlights that create glare; instead, use fixtures with shielded optics that direct light downward and outward gently.
How do you layer lighting in an outdoor space?
Layering means combining three types: ambient (overall soft light), task (focused light for walkways, steps, and cooking), and accent (dramatic uplighting on trees or architectural features). Start with ambient, then add task lights where safety matters, and finish with accent lights to highlight focal points. Dimmers and smart controls let you adjust each layer for different evenings.
Where should outdoor lights be placed?
Place path lights along walkways and driveways, step lights on risers, uplights at the base of trees and architectural walls, and string lights above seating areas. Keep fixtures away from direct sightlines to reduce glare. For patios, mount lights on pergolas or nearby structures. A professional nighttime demonstration helps you see exactly where each fixture should go before installation.
How can I make my backyard lighting feel warm and inviting?
Choose warm white LEDs (2700K-3000K) and avoid cool blue tones. Use dimmers to lower intensity in the evening, and layer light sources so no single fixture dominates. Highlight trees and textures with soft uplighting, and add string lights or lanterns for a relaxed feel. Shield fixtures to prevent glare, and keep light levels low enough to see the stars.
What lighting is best for outdoor steps and pathways?
Low-voltage path lights and step lights are best. Path lights should be spaced every 6-8 feet along walkways, aimed downward to illuminate the surface without blinding. Step lights recessed into risers or mounted on side walls make stairs safe. Use fixtures with adjustable beam angles and warm LEDs for even, glare-free illumination.
How do you light trees and architectural features at night?
Use uplighting: place spotlights or well lights at the base of trees, aimed upward into the canopy. For architecture, use wall-wash or grazing techniques to highlight textures. Choose narrow beam angles for tall trees and wider beams for walls. Integrated LED fixtures with consistent color temperature keep the look uniform. A professional design ensures the right wattage and beam spread for each feature.
Can outdoor lighting be controlled with a timer or smart system?
Yes. Low-voltage systems can be paired with timers, photocells, or smart controllers that turn lights on at dusk and off at dawn. Smart systems let you dim, schedule, and control zones from your phone. This saves energy and extends fixture life. Professional installation includes setting up controls so your lighting runs automatically and efficiently.